Hey, have you just taken over a turning belt conveyor and ended up scratching your head in a hurry as the belt runs off and the machine jams during installation? Do not panic! Today we will chatter about this matter--It's all for naught if you install them in the wrong order.At its core, it's just one sentence.Align the centreline, don't be lazy in debuggingThe first thing you need to do is to get a good idea of what you're doing. Get it right and a novice can become a master in seconds!
🔧 I. Preparation before installation: do not rush to do it, first draw a good "lifeline"!
What's the biggest fear before installation? Reworking if the installation is crooked! Remember these three steps to save time and effort:
- delineate and centre: A straight centre line along the entire length of the site, using a latitude and longitude device or a line-pulling method - this is the "spine" of the machine. Deviation? Later the belt minutes to run off. For example, a factory did not draw a line, the result is that the frame is askew 35mm, leading directly to the maintenance of 3 days downtime - a big loss!
- Check bolts and foundationsKnock on the blackboard! Don't exceed ±1.5mm in the spacing of pre-embedded bolts, and the foundation must be load-bearing enough. Once there was a case, the workers ignored the check, after loading the conveyor ore when the foundation cracked, the machine collapsed ... safety first ah!
- Don't miss anything in the inventory.: Driving drums, rollers, tensioning devices, none of them should be missing. Newcomers often forget the wiper or electrical bracket, later leakage of water leakage crying no place to cry.
💡personal viewpoint: I've seen too many people skip this step and end up spending double the time reworking. Scribing and checking takes an hour tops, but it prevents an 80% installation accident - worth it!
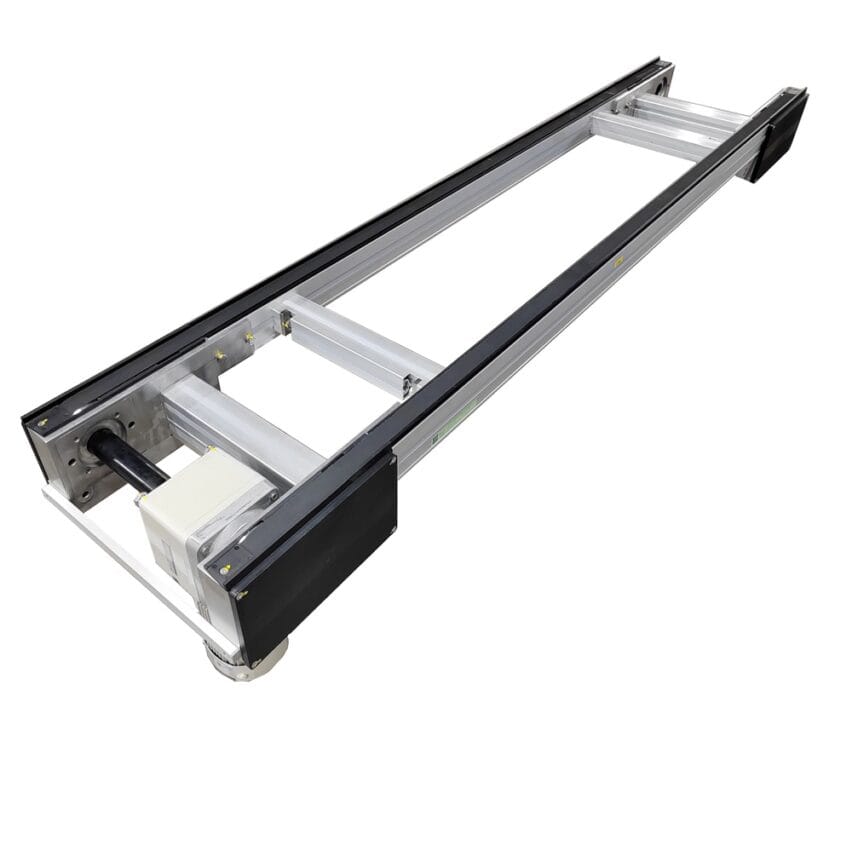
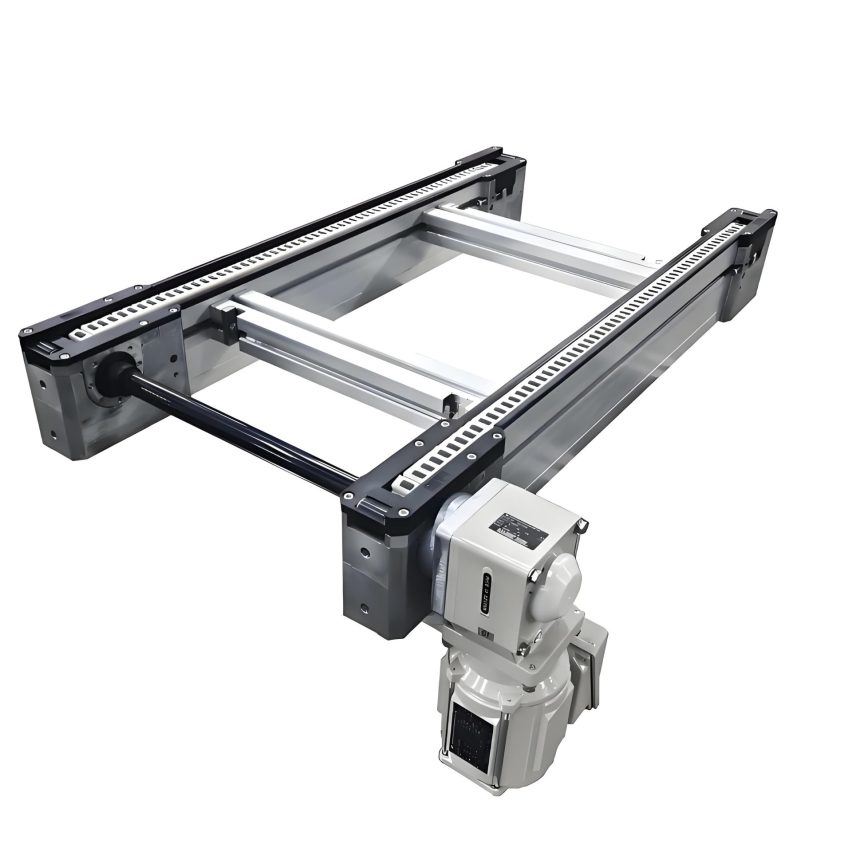
🛠️ Second, rack mounting: from start to finish, not a single step should be messed up
The frame is the "skeleton" of the conveyor, in the wrong order the whole frame falls apart! This is the right way to mount it:
- Headstock → Middlestock → TailstockLike Lego, first install the head frame to fix the drive end, then put together the middle frame one section at a time, and finally put on the tail frame. Use M16 screws to tighten each section, don't be lazy and screw less.
- Centreline error control::
- Single-section rack error per metre ≤ 0.1mm (equivalent to the thickness of a hairline!)
- Cumulative total length error <35mm - over? The belt must be "snaking".
- Levelling tips: The frame under the pad inclined iron, up to 5 pieces of stacked, thin pads clamped in the middle. After padding welded to prevent loosening, or running in the "clunk clunk" ringing headache.
An example: a logistics warehouse installation in strict order, full-length error pressed to within 20mm, the belt life extended by 2 years. The opposite? Oh, the money to change the belt is enough to buy a new machine!
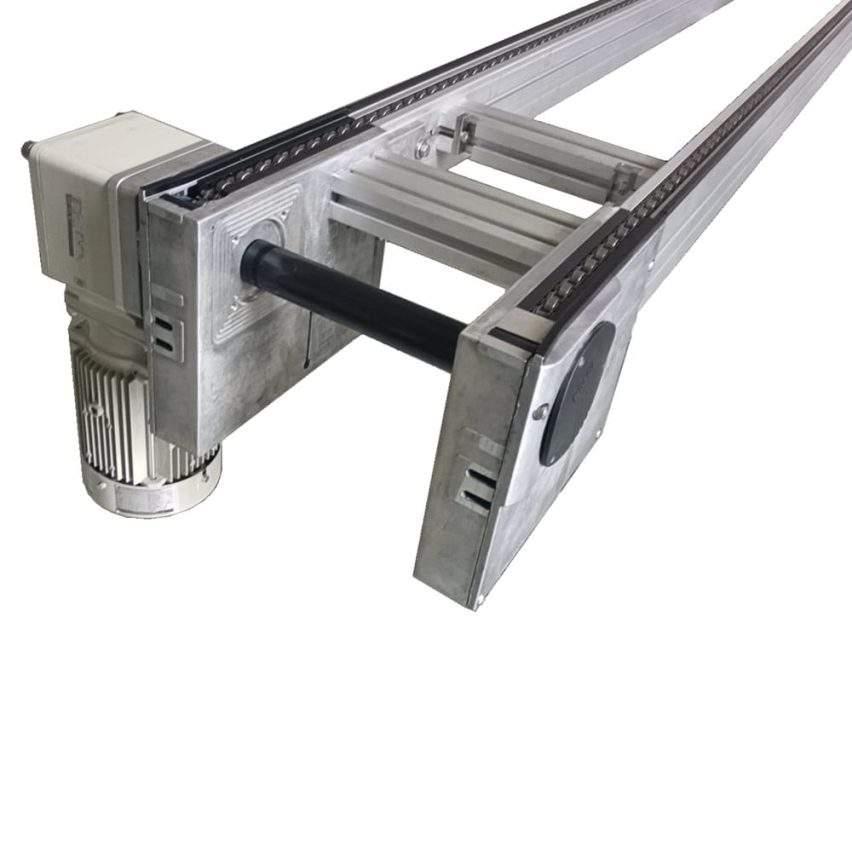
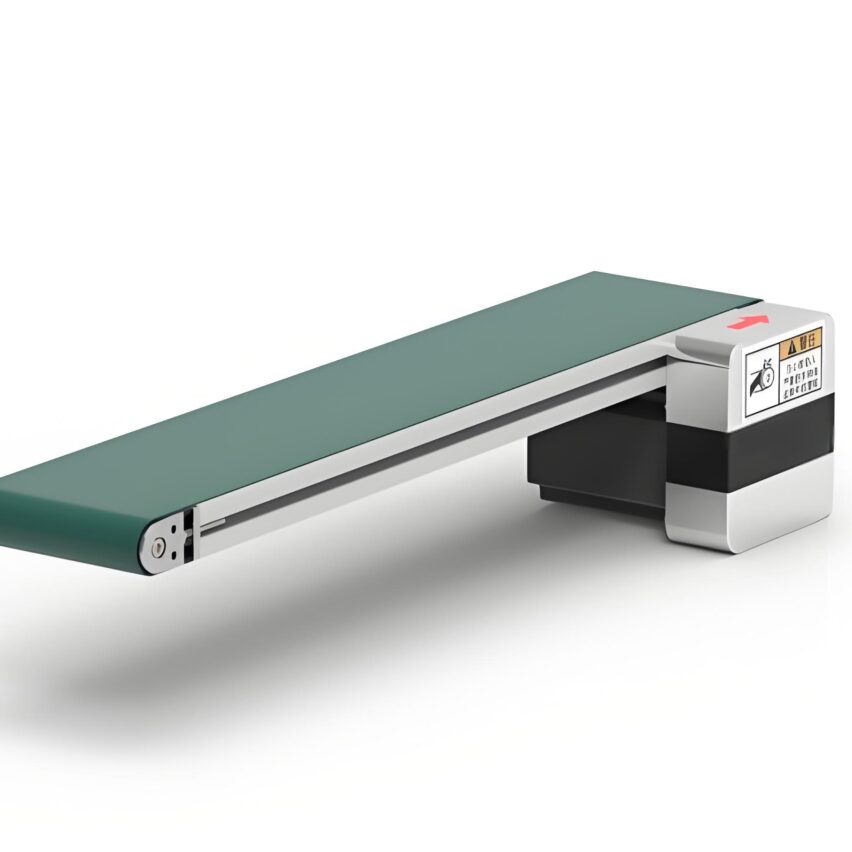
⚙️ III. Driver Installation: Alignment! Align! Still aligned!
Drive device is the conveyor's "heart", mounted directly crooked "myocardial infarction"! Focus on three places:
- Vertical centre line of drive shaft: Take the angle ruler to measure, the axis must be 90° with the centre line. Allowable error? 0.5-1.5mm (over the motor is easy to burn).
- Roller width centred: The centre of the drive pulley is aligned to the centre line, and if it is off, the belt immediately "leaves the house". A food factory workers did not calibrate, the result of raw materials scattered all over the place, the cleaning cost is higher than the installation cost...
- Reducer parallel drive shafts: Coupling gap adjustment 3-5mm, add lithium grease. Remember.Bolt screwed to 80% torqueDon't tighten it all the way - leave a little margin for thermal expansion and contraction.
💡lesson learnt through blood and tears: I've seen drives installed without levelling, vibration overruns in operation, and bearings scrapped in a month. Doesn't it smell good to spend 10 minutes calibrating and save money on replacement parts?
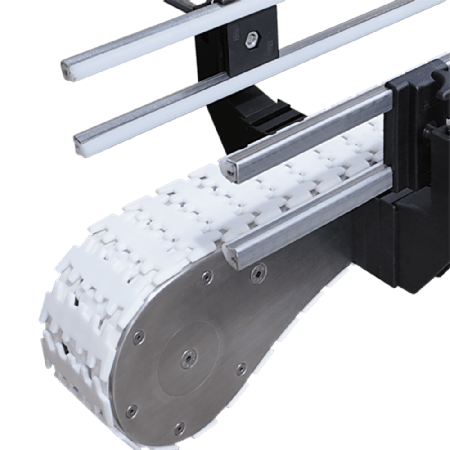
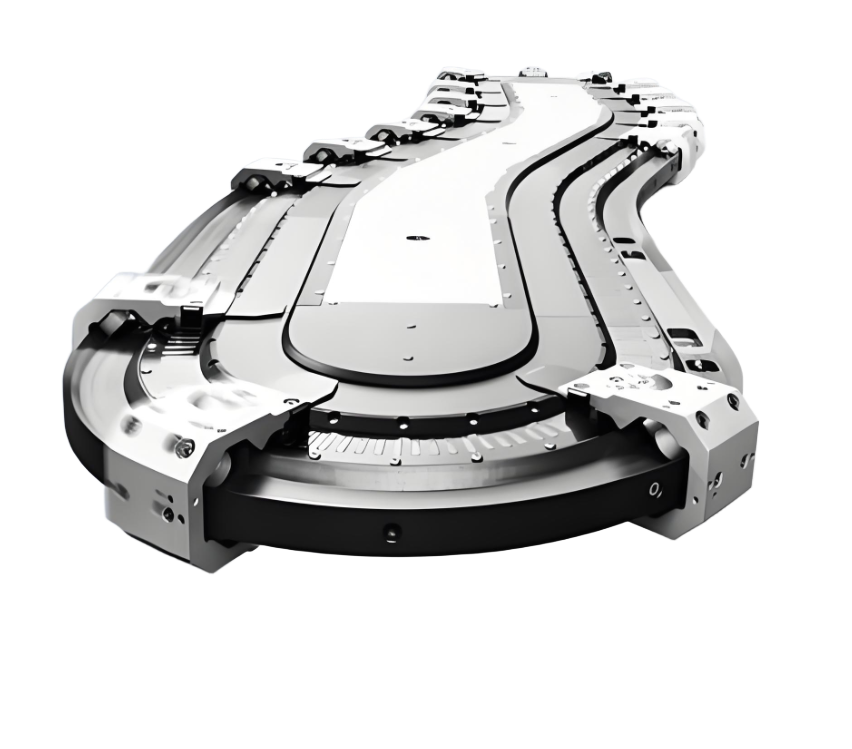
🔩 Fourth, roll installation: turn the "secret weapon" of silky smooth
Roller is the belt turning "joints", installed bad? Clacking also wear and tear! The key in these points:
- Pitch shortening anti-flutter tape: Turning section roller spacing = 1/2 to 1/3 of the straight section (e.g. 1.5 metres in the straight section, 0.75 metres in the curved section). Why? Centrifugal force ah!
- Inclined Angle Adjustment Thrust: Crook the inner side of the rollers forward by 0.5°~1° (don't exceed!) ), creating a lateral force to counteract the centrifugal force. The effect? It's like equipping the belt with a "navigator".
- Rotary test must be done: Turn the rollers by hand after loading. Be flexible and free of jams. Stuck? May be the bearing into the grey - disassemble and clean and then grease.
Compare and contrast cases:
| correct handling | misoperation |
|---|---|
| Roller spacing 0.8m | Spacing 1.5m unadjusted |
| Inclination 0.8° | unadjusted angle |
| Result: cornering silence | Result: Belt wear + noise 90dB |
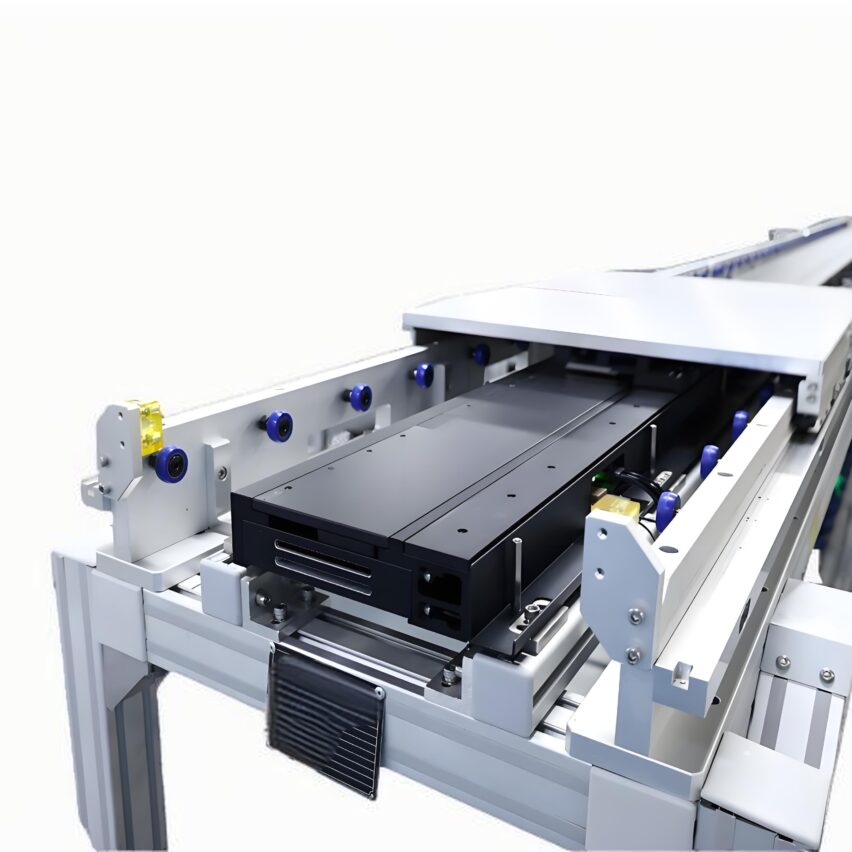
🔄 V. Debugging and commissioning: do not save this step, otherwise the previous work is lost!
Switch on the machine straight after installation? Wait for the machine to be repaired! Debugging is the "ultimate test":
- No-load test machine to check the runout: Start by idling for 30 minutes and focus on three things:
- Belt edge away from the rollers ≤ 10mm (beyond the vertical roller correction)
- Drive roller temperature <60℃ (Hot?) Check lubrication quickly)
- Rattling investigation: "squeaking" sound may be the rollers jammed, "buzzing" sound implied motor overload.
- Load debugging is as stable as a mountain: After the no-load is normal, gradually add material to the 50% load. Observe whether the material is close to the guide plate and falls off? It means the inner curve lifting angle γ is insufficient (adjust 3°~5°).
- Tensioner fine-tuning: Tension roller moved to the limit position, belt sag ≤ 2%. loose slippery, tight easy to break - take the tension meter to measure the most accurate!
Exclusive data: According to my statistics, ignoring the debugging failure rate of up to 40%, but do this step can drop 90% repair rate. For example, a factory adhere to the no-load + load double debugging, three years zero accident!
💎Final Rant: Installing a turntable belt conveyor is like building blocks-The foundation's crooked. It's all collapsing on top.. I've seen too many factories save time on commissioning and end up losing tens of thousands of dollars a month in downtime. Want me to say? Reserve 10% safety margin (such as calculating the radius of 10 metres, the actual take 11 metres), the initial cost of 10,000 more, later save 100,000! Do not believe? Try to know the true flavour!